

Lucky me, there was a huge roll of green felt in Manville (the shed thing) leftover from one of my husband's trips to Burning Man, pre meeting me. The green plus some borrowed blue felt and a stack of felt from Joann Fabrics has gotten me 2 beautiful felt boards for only 2 dollars! (o.k. I had a $5 credit for a return that day, but still, not so bad.)
Here is what to do.
Get a giant piece of cardboard. My pieces are about 25" x 30"
Wrap the felt around the cardboard and measure a bit over. For the scene board cut the blue and green at the same time to make the valley.


I duct taped mine to the back then fabri-tac'd a large piece over it. This is what Jessica did. I thought it looked nice and I'm not about to reinvent the wheel.
Now you have your basic backgrounds.
For the toddler calendar I googled and googled until I found a layout I liked. This was my inspiration.

For our calender I wanted the months and seasons to be color corresponded and I also wanted to keep it from looking cluttered. The dimensions were the part I stressed over the most. Once I knew how big to make the main area, everything else fell into place.
The main cream area is a full sheet of felt. 9x12"
The months and days are 1x4"
The numbers are 1x"
The seasons and weather are 2x2"

After freehanding and goobering up a few numbers I did all the rest with pen first. Tip: A super small brush and lots of paint worked better than a wider brush. You can see that I haven't gotten to painting the months and seasons yet. I did try sharpie on Monday and it looks better than just the pen, but I'm not completely satisfied with it, so the days and months will eventually be paint too. Tip: if you can tell that there is a fuzzy side and flatter side to your felt, paint on the flat side. The fuzzy side is more apt to stick and the flat side is easiest to paint or write on.
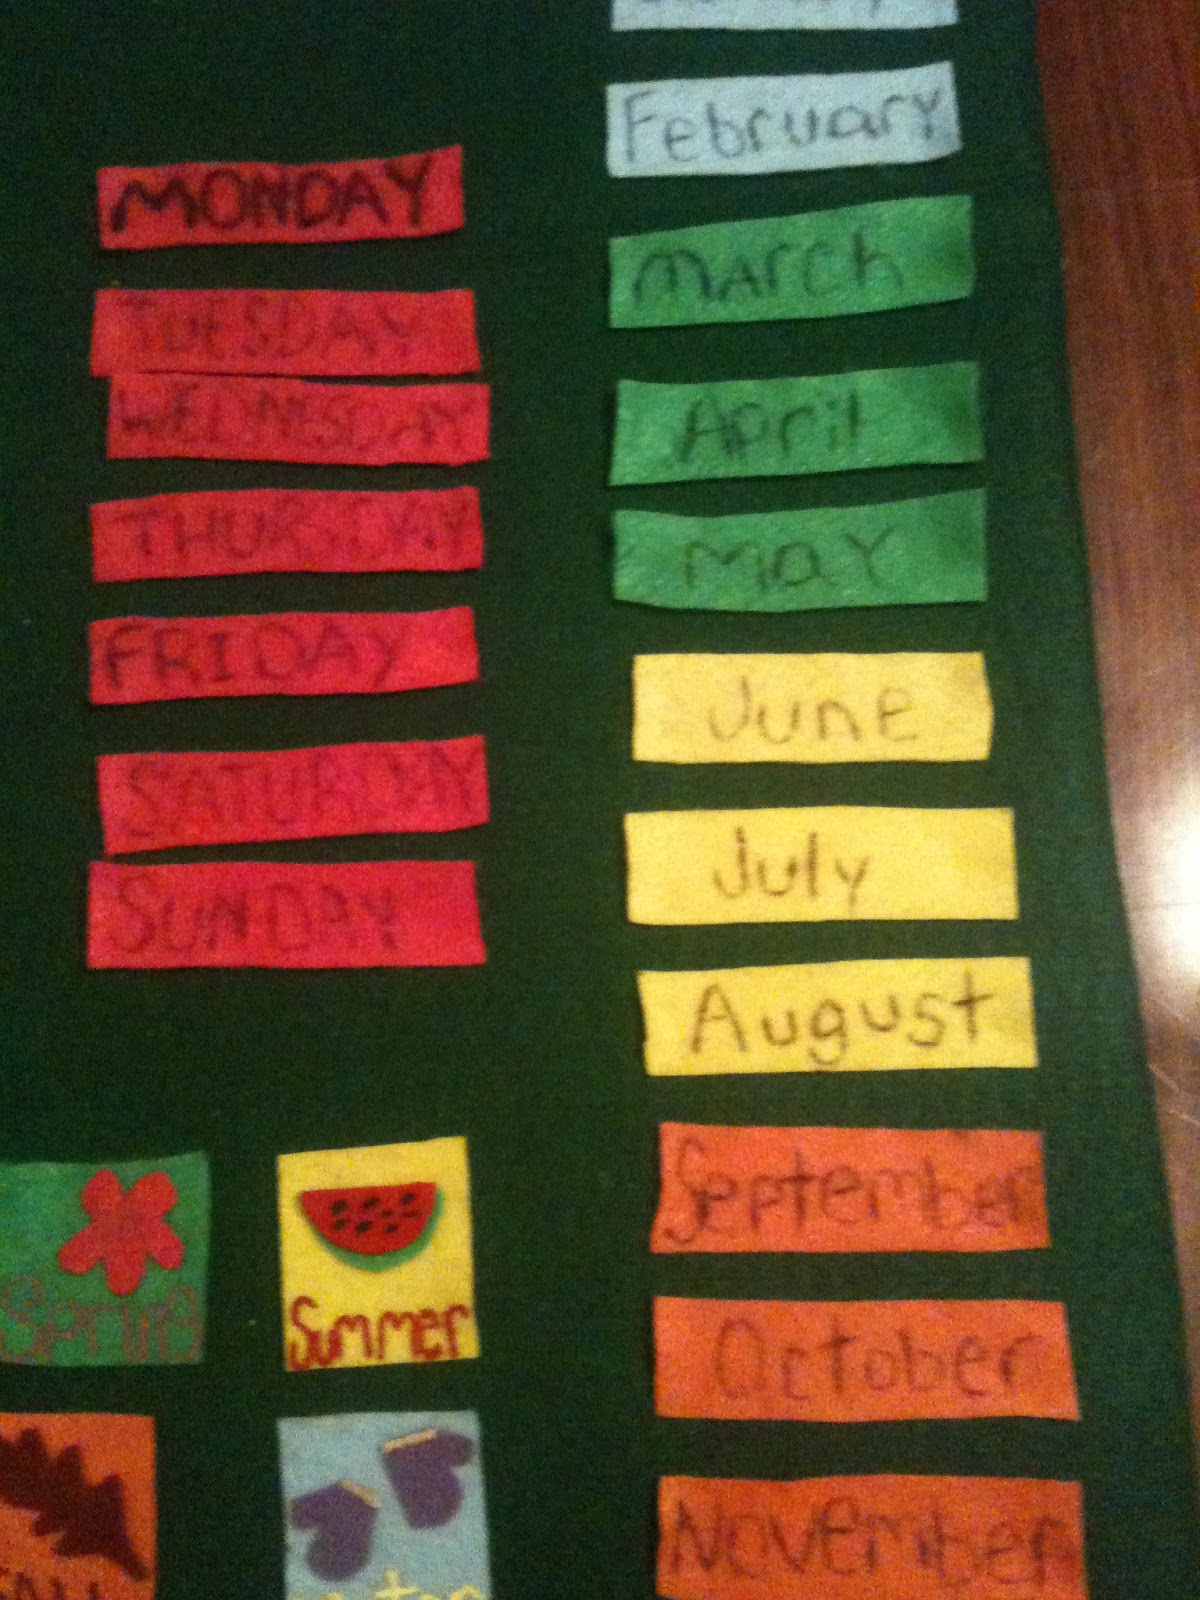
The seasons are my favorite. I love how they turned out. They are a mix of felt cutouts fabri-tac'd on and paint. I used acrylic paints and they worked super well.

Tip: Use old egg cartons to hold the paint. The plastic ones work best but we have used the cardboard ones too with success, it sucks up a bit of paint though.
Tip: You could use Elmers glue for the gluing, but Fabri-tac is awesome.It sticks anything to anything. Instead of using the squirt top, I like to use whatever stick like item is closest, pencil, end of a paint brush, whatever. When it dries you can peel it off of hard surfaces like some crazy cosmic rubber (if it is thick enough).

Here is the mostly finished calendar. It is not perfect, but I just love it! If you attempt to paint felt, there are some flubs that you just have to let go. Tip: Make room for weather. Today was rainy then it turned sunny and windy. I may redo the large area to have room for 3. The weather could be sunny, windy and cold couldn't it?

As for the basic scene felt board, I started with a garden scene. I meant to start with insects for a little lesson I'm teaching in a couple weeks, but I thought the insects needed a place to live. Plus, I felt creative and did the flowers freehand. I wasn't in the mood to cut out a grasshopper.
The number of each flower was an after thought. One daisylike chrysanthemum, 2 Purple Coneflowers, 3 Pentas, 4 Zinnias and 5 Blackeyed Susans (Rudbekia). It will be fun for Beans to count and rearrange the flowers, she was putting them in very specific places as I cut them out. The sun is a pre painted super light weight wood one from Joanns. I fabri-tac'd a rough side velcro strip to the back.

There are so many opportunities for these felt boards my plans include:
A parade of insects (obviously)
farm animals (using Jessica's already cut out patterns)
more animals,
Stories such as the 3 little pigs, Goldilocks and other simple stories.
Shapes in different colors to do patterns, counting and matching.
A clock
Beware... If you hear giggles in the distance you may find a child wallowing in a shower of felt pieces. :) I need to find a better location to put it. Tip: The large cream area ended up being too heavy to stay up so, I put a few pieces of the rough side of velcro on the back, I may put some velcro dots on the rest of the pieces too.

I am sure I will use them for years and come up with all kinds of things to do.
They are super easy and fun, you should make one too!
A special thanks goes out to my husband, who played hard all weekend so mommy could immerse herself in a much needed creative outlet.
Happy Felting.
