Sunday, November 27, 2011

Oh. Christmas Tree

I have read several articles stating that a real Christmas tree is "greener" or more environmentally friendly than an artificial tree. Here is an easy to read chart from the National Christmas Tree Association.  Here and here are a few articles on the Real vs Fake debate. There are numerous facts out there about fake trees being horrible for the environment. Much of the information comes from Christmas Tree cultivators, but I'd have to agree with them, most of the time.

 Daddy, Jenn Jenn & Kristy 1984

Sure if you purchase a fake tree and toss it on the curb every six years because a more spectacular piece of China crap is on the market then the real tree wins, bar none. But compare an heirloom artificial tree with a tree that has been mega mono-cultured with added pesticides, fertilizers and traveled across the country, then you may have a different story. Not to even mention the price of a new tree every year.

Recently we wandered into the Goodwill Christmas store in our town. A huge space dedicated to all things reusable Christmas. There were tons of artificial trees lined up ready to go to a good home. I thought, just like all things 'disposable' there is no reason an artificial tree needs to be such an impact to the environment.

 Nana & Grampy 1975

I promised my Husband years ago, as I pulled my artificial tree out of the box, that we would get a real tree the year that we weren't zig zagging across the South East during the holidays. I admit, I never have had a real tree and this year I thought it would be nice to grant his wishes. To my surprise he replied "I like your tree, it's a family heirloom." and it is. The tree I put up every year was my Nana and Grampy's tree, then our family tree, I took it when I moved out and have been putting it up in my home for the past 12 years. This small tree is 35+ years old, each branch was color coded by my mom with nail polish in the early 80's, has tissue paper stuffed in connector pieces, has been attached to the ceiling with fishing line numerous times to keep from leaning and is always up on a coffee table to look more grandiose then it really is. I love my tree. 

 Christmas morning 2009

I am sure you can "go green" whether you decide to go real or artificial.

Here are a few things to consider.

Real tree
  • Find out where the tree has come from.
  • Try to find a local variety.
  • Buy organic or close to it.
  • Purchase a tree in a pot and plant it at the end of the season
  • When disposing a real tree compost it or be sure it gets picked up with yard debris and not in the landfill. 
  • Don't put tinsel or spray fake snow that could keep it from being composted properly. 

Fake Tree
  • Find one that has been used.
  • Made in America. This will greatly decrease the chances for contamination with lead or other toxins, preserve much-needed domestic manufacturing jobs and reduce shipping.
  • When disposing, do not throw it on the curb. 
  • Take it to a charity. 
  • Repurpose it. Salvage branches and refashion them into napkin rings, candle rings, wreaths, swags or other decorations for walls, doors etc.
  • Reuse it! Keep it in the family for an extended period of time.

So, is your tree "green"? What kind of tree is your family's favorite? Real or Artificial?

Happy Tannenbauming
.

Thursday, November 17, 2011

Healthy Cookies!!

 Finally, after many horrible attempts at making a healthy cookie I found a recipe that suits me. The healthy baked oatmeal bars were to mushy. The Aussie bites crumbled easily and were dry.  I love, love the Vanishing Oatmeal cookie & sub the all-purpose-flour for spelt, barley or whole wheat flour, but it has still too much sugar to eat with no holds barred. 

My sister has been trying the Paleo diet. It really is healthy to eat only whole foods, meat, no grains or sugar and limited dairy. I personally couldn't go without dairy, and think that certain whole grains are good for you. I'm also a sugar addict so, you got me there. Nether-the-less, I have been looking up Paleo recipes for dinners, desserts and my christmas present to her, a (mostly) Paleo Christmas dinner. Lo and behold I found a GREAT cookie! wha hoo!


The N'Oatmeal cookie. (Not Oatmeal cookie).
Adapted from Stacey's Paleo Kitchen. 

Wet Ingredients @ room temperature*
  • 1 small banana mashed
  • 1/4 cup maple syrup
  • 1/2 cup coconut oil (warmed)
  • 2 eggs (v)
  • 2 tbsp milk (v)
  • 1 tbsp vanilla
Dry Ingredients
  • 2 cups almond flour
  • 1/2 cup unsweetened shredded coconut
  • 1 tsp baking soda 
  • 1 tsp salt
  • 1 tbsp cinnamon

Add Ins - About 2 cups total or more
What I used:
  • 1/2 cup raw pumpkin seeds
  • 1/2 cup raw sunflower seeds
  • 1/4 cup dried cranberries
  • 1/4 cup mini chocolate chips (v) (I can't make cookies without chocolate in them :)
    Other suggested add ins:
    • Raisins
    • Dried Blueberries or cherries
    • Chopped dates
    • Cacao nibs
    • Goji berries
    • Flax Seeds**
    • walnuts & pecans
    • Whole grain oats, barley or Quinoa flakes

    1. In a big bowl mash the banana. Add the remaining wet ingredients at room temperature*. maple syrup, coconut oil, eggs, milk and vanilla and mix until combined.
    2. In another bowl add dry ingredients. Almond flour, coconut, baking soda, salt and cinnamon and mix to combine.
    3. Add dry ingredients to the wet ingredients and mix.
    4. Stir in to this mixture your add ins.
    5. Mix until thoroughly combined.
    6. Scoop onto a parchment lined baking sheet and bake at 350 degrees for 13-15 minutes. Let them cool on the pan slightly before removing to a cooling rack.


    *If the wet ingredients are cold it will cause the coconut oil to congeal.
    **Flax seed should be ground. Your body cannot process the exterior to get to the good stuff, though it will provide lots of fiber if whole. Flax oil should not ever be cooked, put oil in smoothies and such for the full benefits.
    (v) The original recipe called for almond or goat milk. For my vegan friends, I'm sure you can make some easy substitutions to the egg, milk & chocolate chips.


    Enjoy!

    I would seriously let Lottie eat as many of these as she wants. There isn't anything in them I wouldn't serve her by itself. I love how fluffy they are with the added crunch of the seeds. Be careful though. They are very satisfying, 3 cookies can leave a belly feeling full.

    Tuesday, November 1, 2011

    Sew Crazy

    Now that Halloween is over I have decided to ride the sewing wave while my creativity is high and get into a few projects I have been putting off for over a year. During the past week of Halloween whirlwind I figured out how to use my sewing machine and pumped out our Halloween costumes pretty quickly. I am proud of myself for making a Lycra maternity super hero outfit from scratch.

    My mom always made special clothes for us (birthday outfits, prom dresses, Halloween, etc) whatever we could dream up she would create to the detail, but always based from a pattern. It was from her that I learned how to sew from a pattern and used those skills to make my own pattern from some of my favorite maternity clothes. No, Simplicity does not make patterns for maternity super hero costumes, go figure.

    The following is not a tutorial, but I hope it will inspire you to take a deep breath and try to create something even if you don't have a pattern. I highly recommend trying it first on cheap fabric and not on $15 a yard silky temperamental double knit, on a machine you have only used once. ;)


    I used a newspaper end roll that we have around for crafts, folded my shirt in half and stretched it out. I measured 1 inch all around it for an easy measurement and to give leeway for mistakes. Then cut out the pattern and put it on the fold of the material pinned like crazy & cut. It literally took me an hour between each step. I would stare at it, text a pic to my mom, triple check that the material was not reversed, tend to Lottie, then stare at it some more. I  labeled ALL the parts of the pattern (sleeve hole, neck, top, bottom, front, back, fold)  it super saved me from brain blanks.


    For the boots I put my most comfortable riding boots on the paper and traced, very wide. I then took in the leg part in and added elastic to the top & bottom. They weren't perfect ,but  I was satisfied that they didn't look like transformer feet any more.


    The rest of my outfit included a simple elastic pencil skirt, belt, cape with super uterus logo (foam & felt), and headband with small super uterus logo. Yes, I had lady parts on my forehead.

     
    I only had to tailor Super Ladybug's boot covers, & sew a simple black skirt. Captain Repurposed Outfit aka Super Duper aka "The Villain" aka Super Dad aka Generic Super Hero needed very little sewing. Not to shabby if I do say so myself. I heart Halloween.


    Now, on to my next project! This is where I need your help.  
    I am covering the princess part of this chair. Sorry Aurora, you must go. It has been so long since I planned it that I forget which fabric I wanted to use, plus I found some more cute fabric.


    Options 1 & 2 
    Option 1. The pink & green floral on the left. Some of this fabric and coordinating fabrics will be in the playroom.
    Option 2. The bold burgundy floral on the right. I like it a lot but, it wont "match" the playroom or the living room & I am worried about the burgundy color against the fuchsia pink. What do you think?


    Option 3. This moddish jungle fabric. I have tons of it. It is so cute. If I did the pink chair in jungle I would get a red chair for Jr and cover Lightning Mcqueen in the same fabric.


     Please let me know which fabric you like. I like them all!!. What to do??

    Happy Sewing.

    Monday, October 17, 2011

    More Farms Please! Part one - Saturday.

    My understanding of food has grown over the years with a very slow learning process, adding tidbits of information upon tidbits. I've read books that "will make anyone go vegan" and watched movies about the food industry that just make you want to cry (I have cried). One of the most influential series I watched was Blood Sweat and Takeout - a sister to Blood Sweet and Tshirts - I recommend both series. It's enough to make you not want to eat food at all. I had a passing thought once about going vegetarian, but in the end decided that I will try my darnedest to eat whole, local, humane raised and killed, organic, pesticide and antibiotic free food. Of course I falter for one reason or another here & there (Yes, I am eating a slice of chocolate Babka from Panera right now. The middle path people, the middle path) but I do try. Finding out exactly where my family's food comes from is important to me. Lucky for us, we have the opportunity to visit local farms during the Annual New Leaf Co-op Farm Tour.

    I started mapping out my ideal route for the farm tour in August. Each year we seem to have something already scheduled. This year I was determined to visit some farms. During this pregnancy I have been craving pork, like a mad woman. Crazy, because I recently noticed that my aversions with Lottie were pork and eggs. ALL of our pork has been coming from Thompson Farms Smokehouse in Georgia. This was my number one stop - I had to see those pigs! I also wanted to go somewhere with the family and a hayride was a must do, so I added Kurtz & Sons to the list too. I thought a day of beekeeping demos at Full Moon Farms would be one of my highlights, but it fell off the list when I slept in on Saturday morning.

    Here are the farms we visited and highlights of what we learned!
    I have to apologize for the lack of pictures. Lately I have been too busy living in the moment to take pictures - yea that seems ridiculous, but for a while I felt like I was living life behind a lens.

    Thompson Farms Smokehouse - I could not find a partner on Saturday to visit farms that were not child friendly. While a day of solitude would have been nice, I decided late Saturday morning that I would prefer the day with my husband and Bean. So we all headed to Thomson Farm, not knowing exactly what to expect. I wanted to see how the pigs lived and learn about how they were killed, but did not want to necessarily see sausage being made! It was a nice adventurous drive - a wrong turn took the Mini Cooper down a dirt road for a good while.
    We arrived in time to catch up to a tour, jogging past a huge field where the some of the pigs lived. They were about 2 to an acre, open pasture surrounded by a little piece of electric fence. They each had their own hut and shared a water hole (think mini retention ponds, lots of them). Did you know that pigs do not sweat? Lots of cool mud pits were to be found for the pigs too.
    When we arrived at the slaughter house we learned that the Thompsons used to keep 50 pigs in 3 separate, small cement pens -- that's 150 pigs in a very confined area. Now there are many, many more in large, open fields. Mr. Thompson mentioned that it takes longer to fatten the pigs up since they have room to exercise but the trade off is they don't get sick as much and the meat is much tastier. After a quick call back after our visit to find out why they switched to a humane certification, Donna explained that when they moved the pigs outdoors to grassy areas, things "naturally went more natural." Then, when the Thompsons started selling to Whole Foods distributions in Altanta and Florida they had to go humane. It was right around this time that they started selling to New Leaf as well. Whatever it was that first fueled the fire is not significant at this point, but I am just glad they did (oh and my phone call taught me that I may be able to find Thompsons pork in Daytona)!

    With the humane certification the killing has to be humane also. The pig must be able to walk, on its own, to the slaughter house. We walked the path into a clean, empty slaughter house (thank goodness!)  to learn about the process. They stun the pig in the brain, first, then in the heart. One. At. A. Time. And check to be sure it is NOT coming back. Then the pig continues through the process. One. At. A. Time. Moving to a different station when the prior pig is finished, one butcher doing each job, sanitizing the knife between pigs.
    I wont go in too much detail, but the most important part for me was that the pig was TOTALLY dead before it was de-haired and only one was butchered at a time. I've seen the scenes of  loads of animals getting forced down lines and 20 guys slicing and dicing as fast as their underpaid selves could. That's how mistakes are made, cross-contamination, entrails opened up, e.coli creeps in and all ick ick ick! That is not happening to my pork!  I also learned that they only butcher 34 pigs at a time. This means that the sausage from Thompson farms is only from 34 healthy, humanly raised and slaughtered pigs as opposed to who knows what parts, from how many pigs, from who knows what locations and countries, over how many days of slaughtering. Seriously, look at the point of origin on your meat. Is it one origin? Two? Just a country labeled? You don't know, do you? Unless you know your farmer.
    Thank you Thompson Farms for a wonderful tour and a true understanding of where our pork comes from.
    For even more information you can see the Whole Story.  Be sure to watch the video at the bottom of the article. And a Local Spotlight from New Leaf Market.

    Oh and Lottie loved seeing the piglets!

    A synopsis on what I learned about animal breading and nursing is a whole other post to come.


    Heavenly Homestead - As the afternoon crept in we headed to Heavenly Homestead. Golden Acres and Backyard Farm were on the wish list, but with hayride scheduled on Sunday already and the option to do Backyard Farm tour anytime, Heavenly Homestead won out. This place was busy! We arrived in time to play on their swing set and see the chickies before the last tour of the day started. On the tour I learned that this small family farm was in transition, moving some animals from a leased farm area to their new 5 acre property. It wasn't the white picket fence, grassy knoll, story book setting for a farm that one would expect. Instead it was a wild Florida yard, ready to be thinned by the new goats in training and broken down further by the chickens.
    The orchard was especially inspiring. It opened up a dialog between me and my husband about the types of fruit trees I would like to place in our tiny urban yard. They also had meat chickens and pork that produce goods for sale.
    Farmer Rick was charismatic and gave a great tour. I overheard that Amy, the woman of the farm, is a homeschooling mom, surely working hard throughout the day. Rick mentioned they have all the duties of a farm plus his 9 to 5 job. I would love more info on some boys clubs that meet out there or how other homeschool families could come out and learn about farm duties while possibly lending a helping hand. I would like to see how much the farm evolves over time. This family is surely one to contact for information on what you can do with a little space and most importantly, a supportive, hardworking family and some ingenuity.

    The farm bug had hit me. They day was done and we were exhausted, hungry and dirty.  I couldn't wait to wake up and do it again. Oh how I wish farm tours were quarterly or bi-annual. I really want to see where ALL our food comes from. The eggs, cheese, butter, beef, fish. Who grew those greens?

    MORE FARMS PLEASE!!

    Our Sunday synopsis is soon to come.

    Happy Food!

    Tuesday, October 4, 2011

    Fun with Felt Part 2. Pumpkin Faces

    Here is a super quick post.

    After seeing a photo of a friend's daughter pinning the nose on a pumpkin I decided our felt board needed a pumpkin with a re-arrangeable face. Lottie has been making silly faces lately so I knew she would enjoy mixing and matching facial expressions on the pumpkin.


    This could also be used as a tool to introduce or continue a discussion on feelings and emotions. Lottie likes to find the different eyes, nose and mouth. Below, she put what I meant to be a nose as mouth and enjoyed it very much. 


    This was super simple to make. It took one 8x11 of orange and one of black. The most time I spent was googling images of pumpkin faces to decide which features to create. I settled with 5 mouths, 5 noses and 5 pairs of eyes. If your child uses the noses as mouths (like mine does) and you count the different slants of eyes and mouths there are an infinite number of  emotional possibilities for your dear pumpkin friend.


    "Silly Pumpkin"


    Happy Felting.

    Tuesday, September 6, 2011

    Fun with Felt

    I had been brainstorming about making a felt toddler calender for a couple of weeks. When my friend Jessica, so crafty BTW, showed up to our preschool homeschool with an awesome farm scene felt board I knew I just had to make one too! This is Jessica's Farm Scene.


    Lucky me, there was a huge roll of green felt in Manville (the shed thing) leftover from one of my husband's trips to Burning Man, pre meeting me. The green plus some borrowed blue felt and a stack of felt from Joann Fabrics has gotten me 2 beautiful felt boards for only 2 dollars! (o.k. I had a $5 credit for a return that day, but still, not so bad.)

    Here is what to do.

    Get a giant piece of cardboard. My pieces are about 25" x 30"
    Wrap the felt around the cardboard and measure a bit over. For the scene board cut the blue and green at the same time to make the valley.


    I duct taped mine to the back then fabri-tac'd a large piece over it. This is what Jessica did. I thought it looked nice and I'm not about to reinvent the wheel.

    Now you have your basic backgrounds.

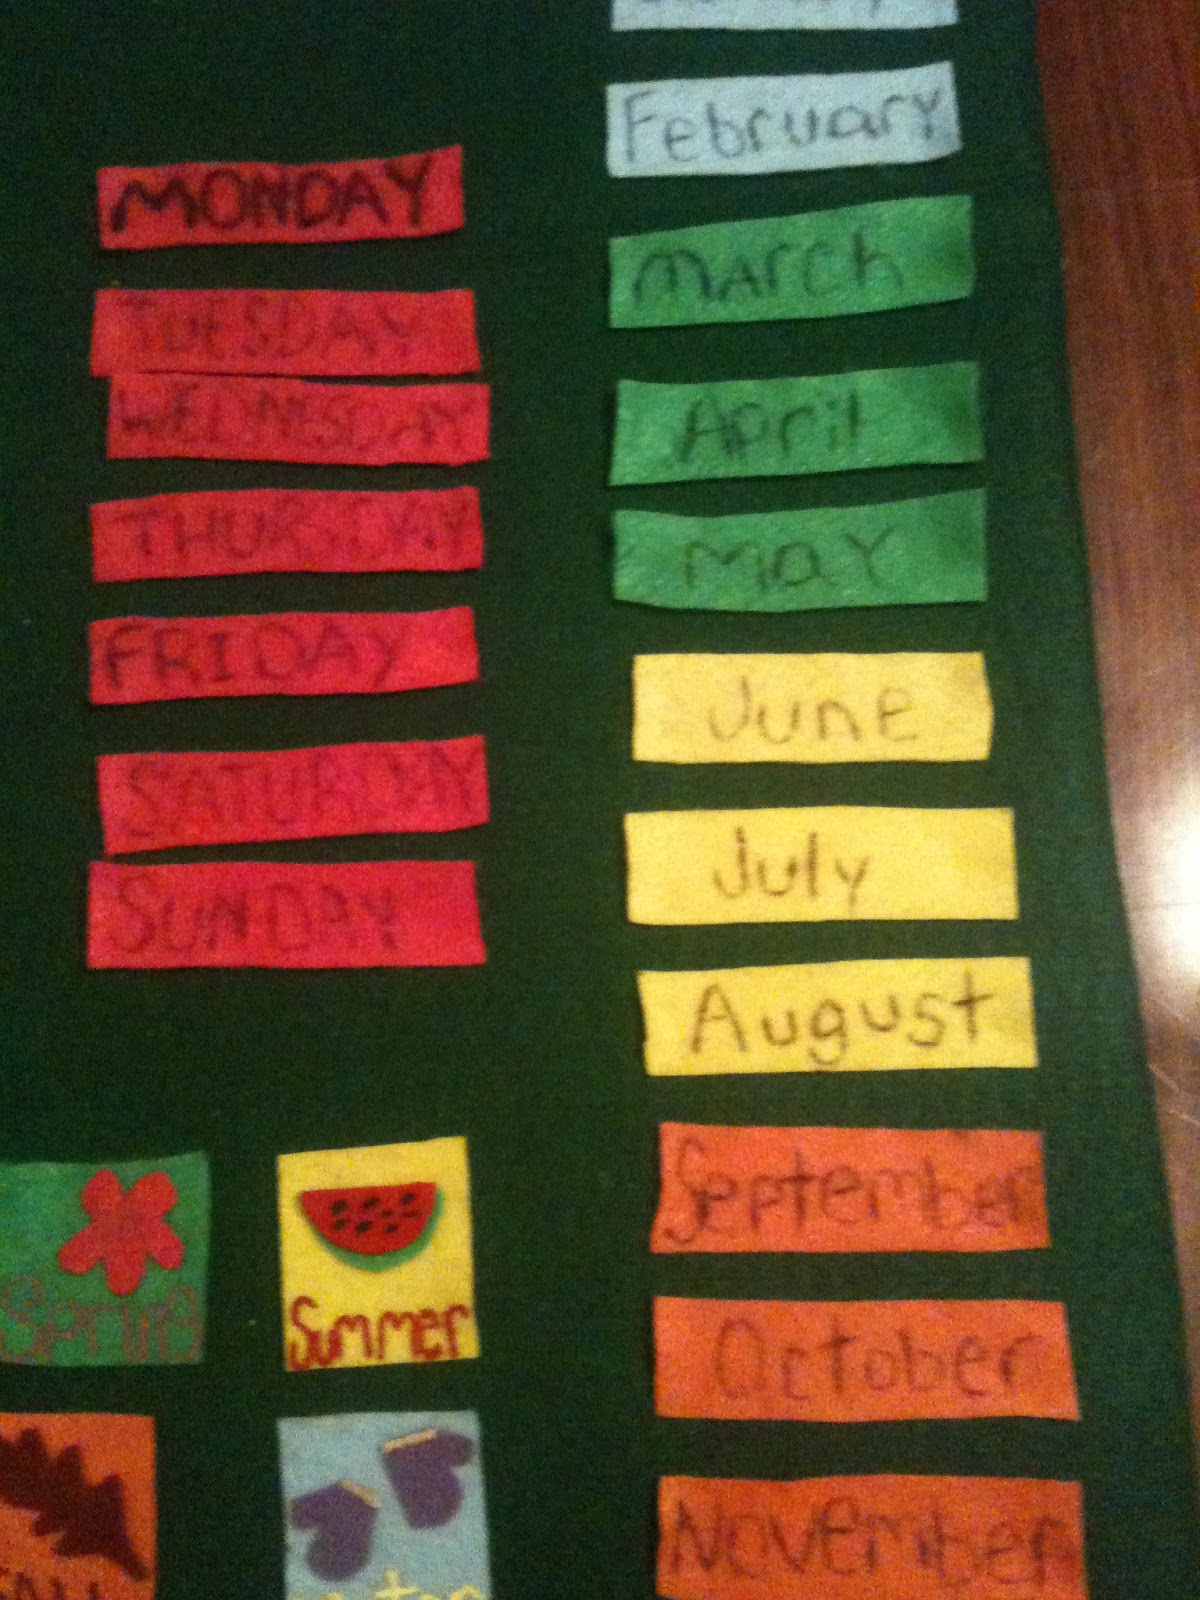
    For the toddler calendar I googled and googled until I found a layout I liked. This was my inspiration.

    For our calender I wanted the months and seasons to be color corresponded and I also wanted to keep it from looking cluttered. The dimensions were the part I stressed over the most. Once I knew how big to make the main area, everything else fell into place.

    The main cream area is a full sheet of felt. 9x12"
    The months and days are 1x4"
    The numbers are 1x"
    The seasons and weather are 2x2"


    After freehanding and goobering up a few numbers I did all the rest with pen first. Tip: A super small brush and lots of paint worked better than a wider brush. You can see that I haven't gotten to painting the months and seasons yet. I did try sharpie on Monday and it looks better than just the pen, but I'm not completely satisfied with it, so the days and months will eventually be paint too. Tip: if you can tell that there is a fuzzy side and flatter side to your felt, paint on the flat side. The fuzzy side is more apt to stick and the flat side is easiest to paint or write on.


    The seasons are my favorite. I love how they turned out. They are a mix of felt cutouts fabri-tac'd on and paint. I used acrylic paints and they worked super well. 


    Tip: Use old egg cartons to hold the paint. The plastic ones work best but we have used the cardboard ones too with success, it sucks up a bit of paint though.
    Tip: You could use Elmers glue for the gluing, but Fabri-tac is awesome.It sticks anything to anything. Instead of using the squirt top, I like to use whatever stick like item is closest, pencil, end of a paint brush, whatever. When it dries you can peel it off of hard surfaces like some crazy cosmic rubber (if it is thick enough).


    Here is the mostly finished calendar. It is not perfect, but I just love it! If you attempt to paint felt, there are some flubs that you just have to let go. Tip: Make room for weather. Today was rainy then it turned sunny and windy. I may redo the large area to have room for 3. The weather could be sunny, windy and cold couldn't it?
     

    As for the basic scene felt board, I started with a garden scene. I meant to start with insects for a little lesson I'm teaching in a couple weeks, but I thought the insects needed a place to live. Plus, I felt creative and did the flowers freehand. I wasn't in the mood to cut out a grasshopper.

    The number of each flower was an after thought. One daisylike chrysanthemum, 2 Purple Coneflowers, 3 Pentas, 4 Zinnias and 5 Blackeyed Susans (Rudbekia). It will be fun for Beans to count and rearrange the flowers, she was putting them in very specific places as I cut them out. The sun is a pre painted super light weight wood one from Joanns. I fabri-tac'd a rough side velcro strip to the back.


    There are so many opportunities for these felt boards my plans include:
    A parade of insects (obviously)
    farm animals (using Jessica's already cut out patterns)
    more animals,
    Stories such as the 3 little pigs, Goldilocks and other simple stories.
    Shapes in different colors to do patterns, counting and matching.
    A clock

    Beware... If you hear giggles in the distance you may find a child wallowing in a shower of felt pieces. :) I need to find a better location to put it. Tip: The large cream area ended up being too heavy to stay up so, I put a few pieces of the rough side of velcro on the back, I may put some velcro dots on the rest of the pieces too.


    I am sure I will use them for years and come up with all kinds of things to do.

    They are super easy and fun, you should make one too!

    A special thanks goes out to my husband, who played hard all weekend so mommy could immerse herself in a much needed creative outlet.

    Happy Felting.

    Saturday, September 3, 2011

    Book Review: The Parrot Tico Tango


    A few months ago I announced I was going barefoot. Remember? Well, I've gotten a spark and decided to get going on this home business adventure. Butterfly Book Nook is totally in the works now. Here is my first book review!

    I ordered our first stock of Barefoot Books right before our house went into major reconstruction so unfortunately, there are many still tucked away in boxes that we haven’t had a chance to glance at. I did, however, grab a few board books to take with us during our exile this summer (I love them all BTW and will do more reviews soon). Today I decided to grab one we haven’t read, The Parrot Tico Tango, to read outside.


    I knew I would love this book, I could tell by its cover, (I know, you are not supposed to judge a book…) but the Parrot Tico Tango has colorful, hand painted artwork. It is so vivid. A beautiful inspiration for the rainforest theme I want to do in the kid’s room. I also have a soft spot for Costa Rica, which was the location inspiration for this book. Some day I hope to move our family there for at least a couple years.  In the story, Tico Tango sees his friends who are each about to enjoy a fresh piece of fruit and wants it! It is a great lesson on greed, emotions and sharing. Each verse introduces the color of the fruit along with several adjectives in a couplet rhyme scheme, which is one of my favorites. The book also has a building repetition of each verse, also excellent for little ones.  In the end, Tico Tango learns his lesson and learns that sharing is the way to go.

    Check out my Barefoot Books Marketplace and see for yourself. Oh, and The Parrot of Tico Tango is on sale right now!

    Have fun browsing and let me know if you have any questions, 

    Happy Reading,